Sunday, September 11, 2011

Peach & Blueberry Buckle


Loosen your belt for this buckle!

This week’s recipe follows, but first, some updates:

ZUCCHINI CHOWDER UPDATE - I made another batch of Zucchini Chowder.  For whatever reason, the skin of the zucchini was extra tough, and even though I cooked it thoroughly, a definite skin texture remained.  Such was not the case the first time I made the recipe.  So, watch out for thick-skinned zucchini!  But the “Big Story” is that I added lump crabmeat to the chowder, and sweet mother of Betty Crocker, it’s absolutely delicious!  The crabmeat was already cooked, so I just placed some cold crab in the bottom of a bowl and ladled the piping hot chowder on top.  The result was amazing!  You’ve got to try it!

WEDDING UPDATE - This post is a little delayed.  It was post-wedding catch-up week.  I didn’t realize how much had been put on “hold” in the weeks leading up to my daughter’s wedding.  She was a beautiful bride, and having the honor of not only walking your “little girl” down the aisle, but also of performing the ceremony is an incredible privilege.  At the beginning of the ceremony, I announced that there would be no photography, indicating that I would give a signal when it was okay to point and shoot.  My “signal” was getting my iPhone out after I offered the closing prayer and benediction in order to take the following shot from my perspective:


My daughter summed it up:  “It was the best day ever!”  It was a perfect day and I couldn’t be happier for Dan and Lauren.  Thank you to so many of you for your well wishes, kind thoughts, and appreciated prayers!

THIS WEEK’S RECIPE – Blueberry Buckle has been a favorite in our family for many years.  Of course it can be made with frozen or canned blueberries, but when fresh are available, using them is a no-brainer.  Peach season is just about winding up and I took a chance by combining half of the blueberries called for in the original recipe (2 cups) and matching them with bite-size pieces from two peaches.  The amount of peaches totaled slightly more than one cup.  As a result, there was more moisture.  This, in turn, had the effect of requiring increased baking time from the original recipe by about five minutes.

I did a little research on “buckles.”  In doing so, I found a great site called “What’s Cooking America.”  It gives suggestions for what to do with in-season produce.  The site includes recipes, as well as the basics for preparing produce that is locally available.  On a page detailing the history of cobblers, crisps, crumbles, and pandowdy, I learned that a buckle is a single layer cake with berries added to the batter.  It is topped with streusel-type crumbs which give it a buckled or crumbled appearance, which is certainly true.  Check out the cross section picture at the top of this post.  Can’t you imagine layers of rock under the earth?  Could be a science lesson!

PEACH & BLUEBERRY BUCKLE


Ingredients
For the batter:
½ cup butter (unsalted)
¾ cup granulated sugar
1 egg
2 Tablespoons baking powder
2 cups sifted flour
½ teaspoon salt
½ cup milk
*1 cup fresh blueberries
*1 cup fresh peaches, cut into bite-size pieces (approx. 2 med. Peaches)

For the crumb topping:
¼ cups soft butter
½ cup sugar
1/3 cup flour
½ teaspoon ground cinnamon

Directions:

Prepare the fruit in advance by rinsing and draining the blueberries and cutting the peaches into bite-size pieces.  Don’t forget to use the sure-fire way of removing the skin from the peaches, as described in the previous Peach Cobbler post.

Sift the dry ingredients together so that they are ready in advance.  In an electric mixer, cream the butter until smooth.  Add the sugar and beat well until light and somewhat fluffy.  Blend in the egg.  Add the dry ingredients, (approximately a third at a time), alternating them with the milk , beating until smooth.

Fold in the fruit.  You want to add the fruit to the batter keeping as much as possible intact.  This is going to be a challenge because the batter is very thick.  

“Folding” means that you use a spatula to scoop under the batter and lift it up and over the fruit.  Doing this several times will incorporate the fruit into the batter without smushing the fruit to smithereens.  (Did you ever notice that you can’t just have one smithereen?)  Check out the photos to see how it should look.  

You’re going to smash a couple of berries.  It just can’t be prevented, but the technique of folding will help.  You’ve got to crack a few eggs to make an omelet, and you’ve go to smash a few berries to make a buckle.

Scoop the batter into a lightly greased 9”x9” baking pan or dish.

Next make the crumb topping, also in the electric mixer.  If you wish, you can use a pastry blender, instead.  Add all ingredients at once and mix or blend until crumbs form.  

Sprinkle the batter with the crumb topping and bake at 350° for 50-60 minutes.  Mine took the full 60 minutes.  With most cakes a light touch that springs back indicates that it’s done.  That is a challenge with a buckle, due to the crumb topping and the denser end product.  I suggest using a cake tester or toothpick.  When it is inserted and comes out clean, the buckle is done.

Serve it warm if you can.  While I really dislike eating cold cakes, this one should be kept refrigerated due to the fruit content.  It’s a moister cake as a result, which can invite spoiling.  A quick trip to the microwave can reheat it.

*If you want to make a blueberry buckle, replace the peaches with a second cup of fresh blueberries.  This recipe is great using other fruit, especially red raspberries.

Enjoy!

Friday, September 2, 2011

Zucchini Chowder and a Wedding


My little girl is getting married.  Today.

It doesn’t seem possible, and it certainly hasn’t sunk in yet.  You see, I still remember her as a little two-year old serving us make-believe food from her play stove.  Back then she was “Neenie Beanie,” a name she gave herself, not being able to say “Lauren.”  She came up with the Neenie part, and we added the Beanie.  Once, for two weeks after she slathered petroleum jelly in her hair, she was “Neenie Beanie Vaseliney.”

At that point in time, she couldn’t say “Willauer” either, and so her last name was “Waddy.”  One time when we were at a family bowling get together at Limerick Bowl, the always adventurous Lauren got separated from us.  A minute later, over the PA system came, “Will the parents of Neenie Waddy please report to the front desk.”  We fell on the floor…literally.  (The lady on the PA system was laughing, too.)

But now my little girl is all grown up.  She not only cooks and cleans for real, but she also deals with hypodermic needles, vital signs, code blues and cardiac patients.  She and her fiancé, who is also a registered nurse, have their own language, just like us educators.  While I’m incredibly happy for them, and give them my unconditional blessing, love and support, a part of me will always miss that little girl with the Pebbles tuft of hair on the top of her head and the miniature cast on her arm, (which, by the way, she would use to bop her brother).

So what does that have to do with Zucchini Chowder?  Not much, although Lauren’s favorite thing that I make is Potato Chowder (*Future Post Alert*).  Okay, so it’s a stretch.  I know.

This week’s recipe comes from Jennie Renninger, of Renninger’s Farm.  Jennie’s dad, Jay, told me about a whole bunch of zucchini recipes, one of which I’ve already blogged:  Linda Fryer's Zucchini Crisp.  “It tastes just like apple crisp,” Farmer Jay told me, and it did.  That didn’t make me any less skeptical about this recipe for Zucchini Chowder.

“You won’t believe it!”  Jay drew me in again.  “This one tastes just like clam chowder.”

Of course I had to try it.

Jennie reports that she has never tried actual clam chowder and therefore cannot vouch for her dad’s assessment, but she does confess that she loves this recipe.  “This one is foolproof,” she promised me.

That sounds like the perfect “dad” recipe to me.  It was originally given to Carol Renninger by an anonymous customer at the farm, so unless that person steps forward, we can’t give proper credit.  I strongly suggest making it exactly as described.  I did, and remarkably it does taste like clam chowder!

ZUCCHINI CHOWDER
(click on any image to enlarge)

Ingredients:
2 medium zucchini, diced
1 medium onion, diced
2 Tablespoons minced fresh parsley (or 1 Tablespoon dried parsley)
1 Tablespoon dried basil
1/3 cup of butter
1/3 cup flour
1 teaspoon salt
1/4 teaspoon pepper
3 cups water
3 chicken bouillon cubes (or vegetable bouillon)
1 teaspoon fresh lemon juice
2 medium tomatoes, remove skin and seeds, diced (or 14.5 oz can diced tomatoes)
1 can (12 oz.) evaporated milk
4 ears sweet corn, husked and kernels removed
1/4 cup Parmesan Cheese

Directions:

Instead of two medium zucchini, I used one larger one.  Not baseball bat-sized, but close.

Therefore, I felt compelled to halve the zucchini and scrape out the fibrous core and seeds.  Jennie tells me that this isn't necessary with "less mature" zucchini.

Long strips were then cut from each hollowed half and the strips were cut into small cubes.

In a Dutch oven or large pot melt the 1/3 cup butter over medium heat, and sauté the zucchini, onion, parsley and basil until vegetables are tender.

While that is sautéing, prepare the fresh tomatoes by peeling them.  To do so, heat water in a saucepan to boiling.  The water should be deep enough to submerge the tomatoes. 

Cut a shallow “X” into the top and bottom of each tomato.

Submerge the tomatoes in the boiling water until the edges of the skin where they have been cut just starts to loosen and peel up.  This should take 10-30 seconds.  If you can’t see anything happening, remove the tomatoes after 30 seconds.

Remove the tomatoes to an ice water bath to halt the cooking of the tomato. 

When chilled, the skin of the tomato will easily peel off.  You may have to use a paring knife to get it started.  After the skin is removed remove the seeds and dice the tomato and set aside.

In a small bowl, blend 3 cups of water and 1/3 cup of flour until the flour is no longer clumpy. Using an electric hand blender speeds this up.

Gradually add the flour-water mixture to the vegetables. Add the bouillon cubes, salt, pepper and lemon juice, mix well. Bring to a boil, cook and stir for 2 minutes.

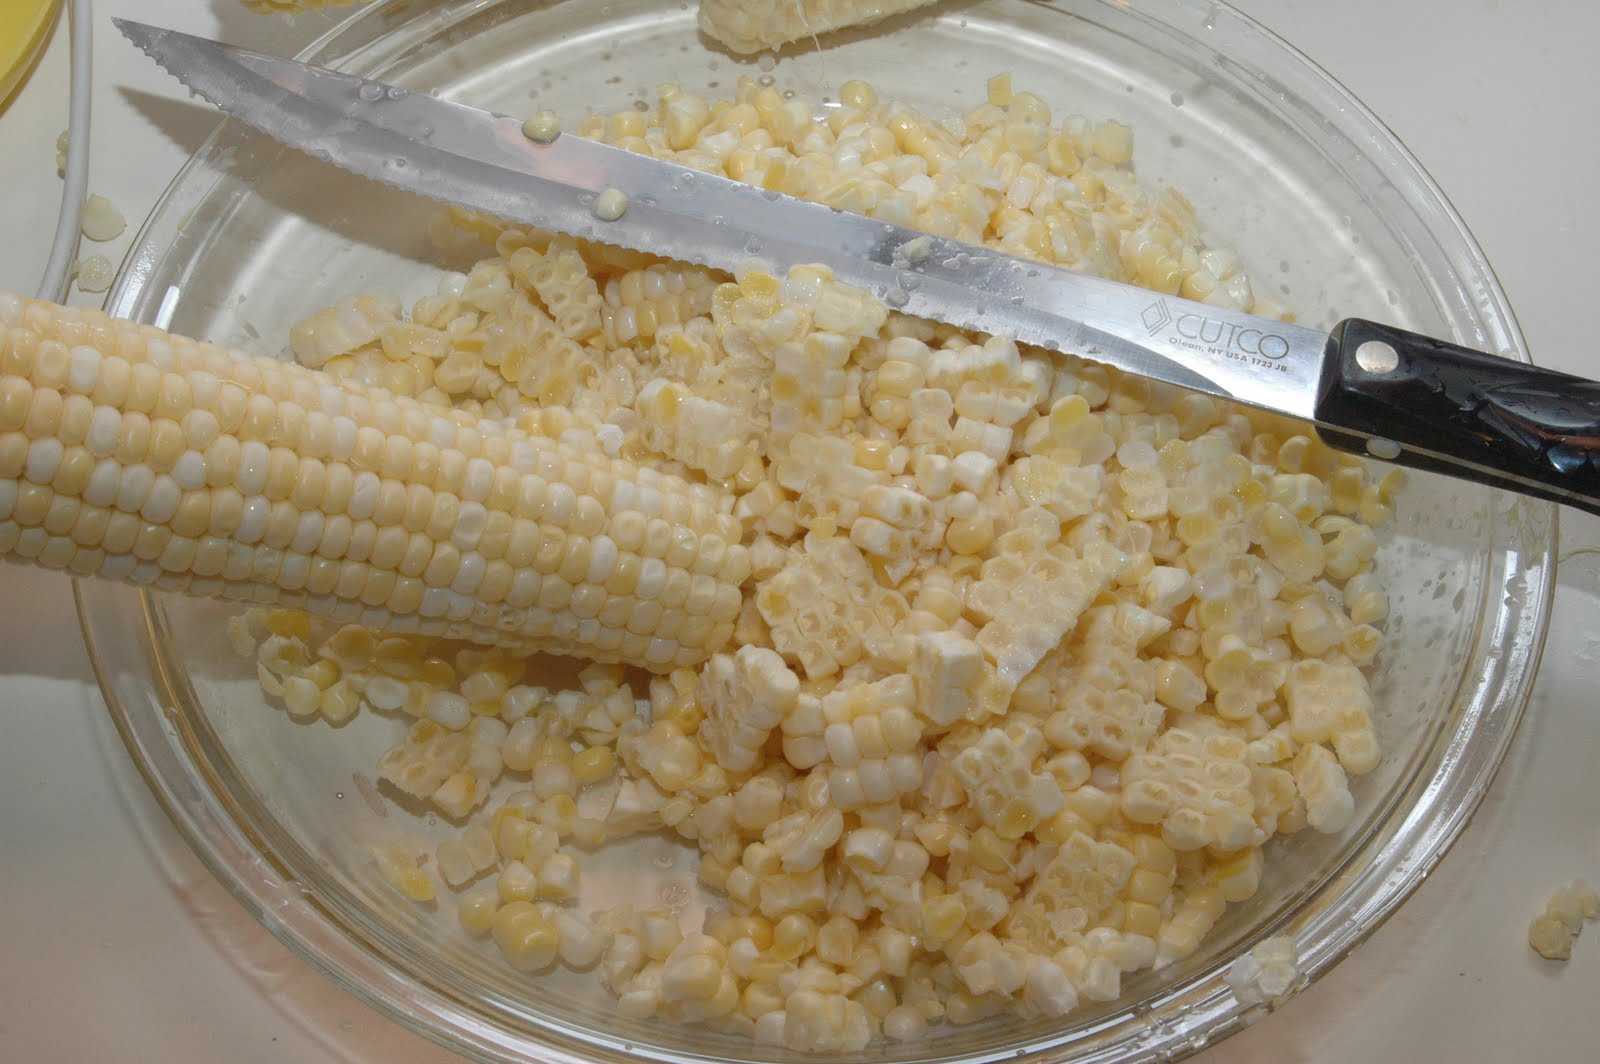
While that is cooking, cut the kernels off of two ears of corn.  I've found that it's easiest to do this with a serrated knife.  Cut the narrow tip off of the ear of corn to make a flat end and if you have the little corn-on-the-cob holders, put one in the other end to protect your fingers.  Hold the ear vertically in a shallow container, like a glass pie dish.  Cut down one side of the ear and rotate for each new cut.

Add the tomatoes, evaporated milk and corn. Bring to a boil. Reduce heat, cover and simmer for 5 minutes or until corn is tender. Just before serving, stir in the parmesan cheese.

Jennie reports that she has successfully frozen this chowder to enjoy during the winter.  If you want to freeze it, leave out the Parmesan cheese and add it just before serving.  (It's even delicious without the Parmesan.)

Enjoy!

Friday, August 26, 2011

Crab & Sweet Corn Fritters

I guess it should be obvious that I’m a nut for new recipes.  I’m always on the lookout and if I try something at a gathering that’s new to me and delicious, I don’t hesitate to ask for the recipe.  By the same token, I often find recipes in magazines, newspapers, and online.  The Internet is amazing for locating recipes.  I routinely hear from a lot of people who like to cook, especially since starting the TADITK blog.  You’d be amazed at how many adventurous souls there are who, like myself, cruise cyberspace in search of the perfect recipe for whatever they have a hankering.  The problem is, there are not that many perfect recipes out there.  We all have our individual tastes and preferences.  What most of us wind up doing is tweaking.

Now a word of caution:  Tweaking is riskier when baking than when cooking.  Baking is a science.  You have to measure the ingredients carefully, add them in the correct order, even mix them properly.  Think about it.  Cookies and cakes have the same basic ingredients.  It’s how you put them together that makes the difference.  When baking, the oven has to be at the right temperature and certain recipes even call for the proper humidity.  At the bakery, (Latshaw’s Bakery in Spring City, PA, 1882-1974), the oven had steam vents for baking certain types of crusty bread, but forget trying to bake cakes under those conditions.

Cooking, on the other hand, is an art.  A little of this, a little of that…you experiment with combinations of spices and ingredients.  You develop a “feel” for cooking, and rarely...at least less frequently, do things go awry.

So, when I’m cooking, I usually start with several recipes and take what I think is the best from each.  I almost always have a pad and pen nearby on which to write down what I’m using.  And when I forget to write it down, I’m almost always sorry, because invariably I can’t remember what I’ve used by the time the dish is ready to be served.


This week’s recipe is adapted from one I found online at Epicurious.com.  It really caught my eye.  Corn fritters were one of Mom’s specialties when I was growing up, and a love of any type of seafood was cultivated in the restaurant that my grandmother operated adjacent to the bakery.  (We continued to sell raw oysters in the bakery even after the restaurant closed.)  My love of crab, however, was advanced by several trips to my college roommate’s family’s shore house in Ship Bottom, New Jersey.  There I learned to crab.  It was an awesome experience.  I can’t think about it without my mouth watering.  (Eating the crabs, that is, not catching them.)

Corn fritters are kind of a hybrid of cooking and baking.

Now there aren’t too many recipes for crab and sweet corn fritters on the web, so I was kind of locked in.  I pretty much made the recipe as found.  The part that threw me was the ½ cup of cornstarch.  Whaa?  I never heard of using that much cornstarch in anything, but I was a good (baker) boy and followed the published recipe to the letter.  The results were fine.  Alone, the fritters were pretty bland, but again, you have to follow the complete recipe and serve them with sour cream and the sweet chili sauce.  (Don’t forget the splash of fresh lime juice, too.)  When I make these again, I’m going to lose the cornstarch and double the flour, and then add two teaspoons of baking powder.  That’s just how I “feel” about it!

CRAB & SWEET CORN FRITTERS
(click on any image to enlarge it)

Ingredients:
8 ounces of cooked crabmeat (I used claw meat)
2 green onions, thinly sliced
½ teaspoon chili powder
1 Tablespoon chopped fresh cilantro leaves
¼ to ½ teaspoon kosher salt
¼ teaspoon freshly ground black pepper
½ cup all-purpose flour
½ cup cornstarch
2/3 cup cold water
2 eggs, beaten
2 ears of sweet corn, cooked and kernels cut off

For serving:
Sour cream
Sweet chili sauce (available in the Asian section of larger grocery stores)
Lime wedges

Directions:

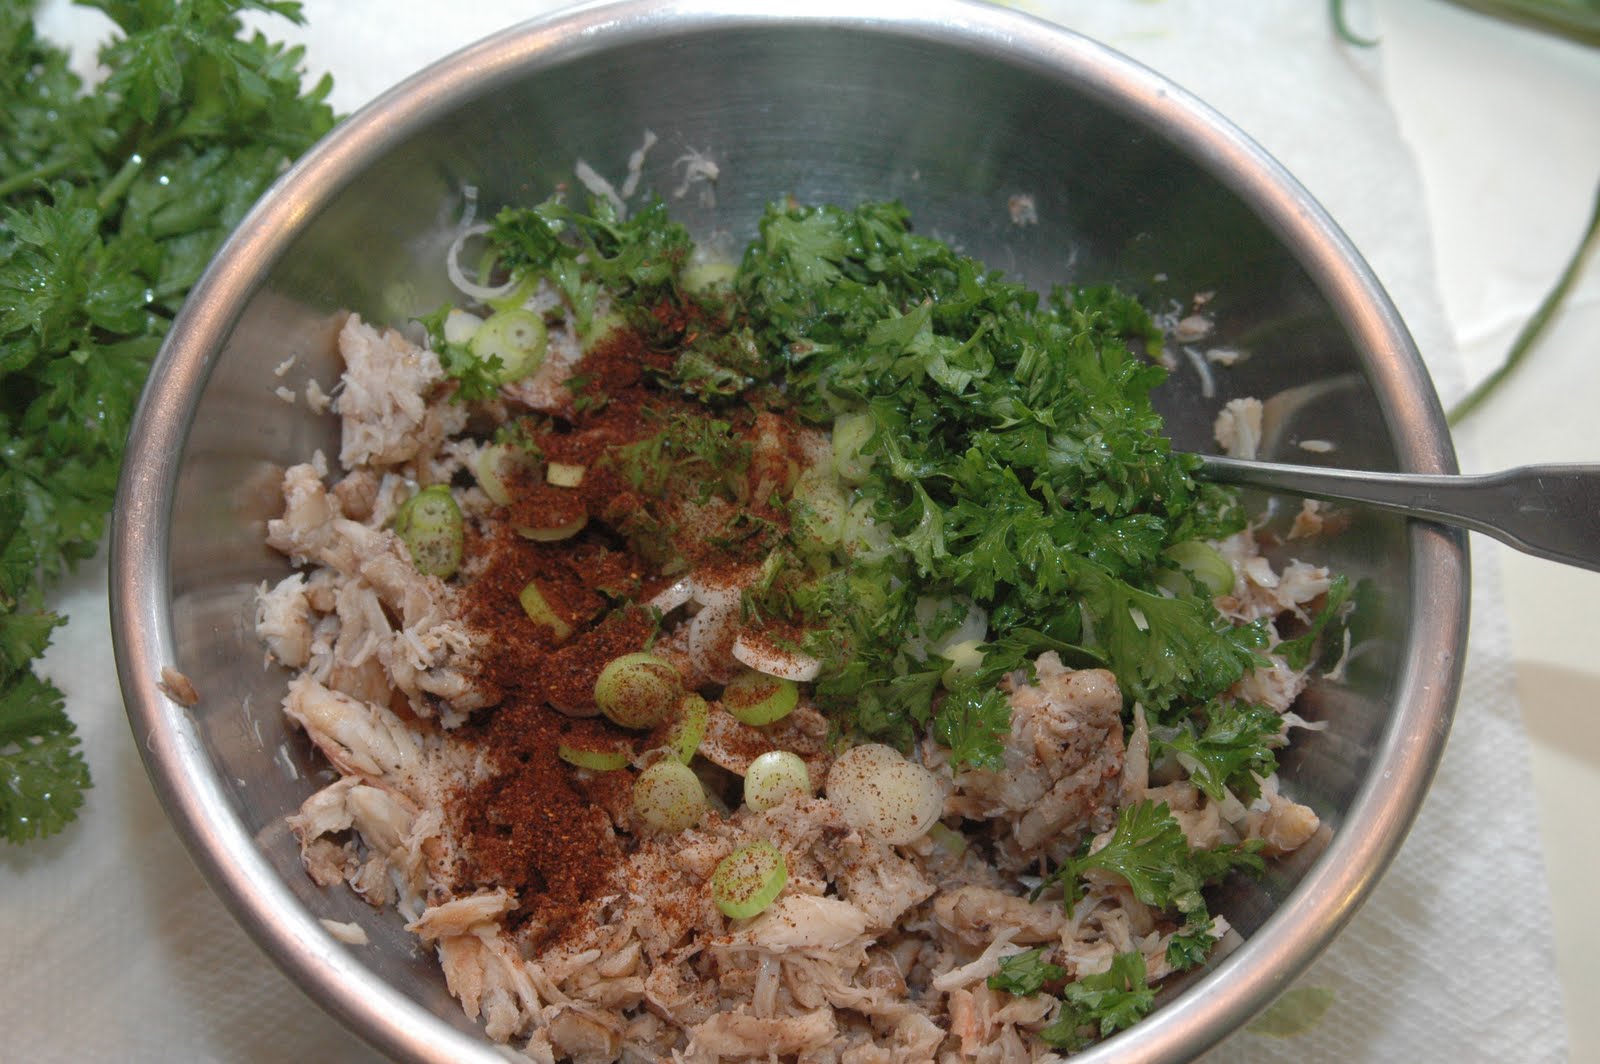
Place the crab in a medium-sized bowl and break up any clumps or large pieces.  

Add the green onions, chili powder, cilantro (parsley can be substituted), salt, and pepper.  Toss lightly and set aside.

Next, cook the sweet corn.  If you have a microwave, you don’t have to prepare a large vat of boiling water.  Shuck the husk off of the ear of corn and remove as much of the tassel a possible.  

Rinse under cold water and wrap each ear in a sheet of waxed paper, twisting the ends closed.  Microwave both ears on high for about 5 minutes.  

When cool enough to handle, cut the kernels off of each ear into a shallow dish.  Set aside.

In a separate bowl, sift the flour and cornstarch, or flour (1 cup) and baking powder (2 teaspoons), if you want to skip right to my proposed “second attempt.”  Add 2/3 cup cold water and the eggs and whisk until smooth.  The mixture should have the consistency of heavy cream.  

Stir in the crab mixture and the sweet corn kernels.

The original recipe called for cooking the fritters on a griddle over your outdoor grill.  That was just a little to risky for me.  I used my electric frying pan set to 350°.  Lightly grease the cooking surface with about a Tablespoon of oil.  You can distribute the oil with a spatula or a paper towel. 

Spoon batter onto griddle and cook for 3 minutes on each side, or until golden brown.  After flipping, you may want to lightly press down on the fritter in order to make good fritter to griddle contact.  (I’ll bet those words have never been put together before!)  This recipe made twelve 3” fritters.

As I said before, eating the plain fritters will disappoint you as they’ll be bland.  However, some sour cream (or crème fraiche), some sweet chili sauce, and a spritz from a wedge of lime will take them over the top.  You can garnish with sprigs of cilantro, too.  Leftover fritters reheated fairly well in the microwave.


“NORMAL” CRAB CAKES

There are about as many recipes for crab cakes as Carter has liver pills, (or however that saying goes).  Here’s mine.  Simple…easy…and delicious.  I favor crab cakes with more crab and less filler.  This recipe calls for just enough panko or bread crumbs and eggs to hold the crab together, (although one egg would have probably been enough).  If you bake or broil your crab cakes, you can get away with less ingredients that serve as a binder.

Ingredients (makes 6 crab cakes):
8 oz. cooked crabmeat
½ teaspoon Old Bay Seasoning
2 Tablespoons fresh parsley, chopped
¼ teaspoon Kosher salt
¼ teaspoon freshly ground black pepper
½ cup panko breadcrumbs (or regular breadcrumbs)
1 or 2 eggs, slightly beaten

Directions:
Combine all ingredients in a medium bowl and toss until well blended.  Spoon mixture onto surface of lightly greased cooking surface.  If necessary, form into circular cakes with a spatula.  Cook for 3 minutes on each side, or until golden brown.  Serve with cocktail sauce. 

Enjoy!

Friday, August 19, 2011

Peach Cobbler


About three weeks ago, I had the honor of being asked to say a few words at the rededication of the World War I memorial in Royersford’s Victory Park.  Kyle Thorpe, aspiring for scouting’s highest rank, had restored the monument for his Eagle Scout project.  It was a great day to give tribute to those who served in "The Great War," especially those who made the ultimate sacrifice.  Most people are unaware that there is no national memorial for WWI.  The only recognition for these individuals can be found in small town and borough monuments across our country.  Congratulations to Kyle and the other scouts who assisted him in successfully completing this project!  (Click here for Limerick-Royersford-Spring City Patch coverage of the rededication.)
The rededication was not only a great day for remembering WWI servicemen and women.  It was also a great day for remembering my own participation in Boy Scouting.  I never made Eagle, attaining the second highest rank of Life, but I have carried the experiences I was provided and the lessons that I learned with me all my life.  Some are comical.  For example, did you know that if you confuse instant milk with instant mashed potatoes when making hot chocolate, you’ll get chocolate mashed potatoes?  (Of course there was someone in our troop who thought they were great.)

Other experiences had a more profound and lasting effect in my life, such as the opportunities for leadership.  I wonder if the adult leaders of the troop understood to what extent their lives were held in our hands when they permitted us to plan and prepare the meals for a weekend-long camping trip.  I also produced a monthly newsletter for our troop, honing early (and primitive) writing skills.  I recall strong feelings of accomplishment after surviving the Order of the Arrow Ordeal and upon completing the Mile Swim…twice.  In fulfilling the Order of the Arrow, I agreed to the following:  “I do hereby promise on my honor as a Scout that I will always…regard the ties of brotherhood as lasting, and will seek to preserve a cheerful spirit even in the midst of irksome tasks and weighty responsibilities, and will endeavor, so far as in my power lies, to be unselfish in service and devotion to the welfare of others.”  I had no real idea of what I was agreeing to in signing that.  But as in the case with most quality youth programs, seeds well-planted more often than not, bear fruit.

Photo credit:  Dirty Gourmet
Soon after I started There’s a Dad in the Kitchen, I received a comment from long-time friend and fellow scout, Jack Neborak.  In response to a dessert recipe, Jack wanted to know when I was going to post a recipe for peach cobbler like my dad used to make on our scout camping trips.  That memory also took me back.  I remember it so clearly.  We used canned peaches and Bisquick.  The fire was readied, until only red-hot coals were remaining.  We used a cast iron Dutch oven to bake in.  To provide an air space under the pan so the bottom of the cobbler wouldn’t burn, three small stones were placed on the floor of the Dutch oven, and the pan with the unbaked cobbler was placed on top of them.  The lid was put into place and coals were heaped on top.  The Dutch oven was then nestled in a bed of more coals.  There was no checking on the progress of the cobbler as it baked.  That would blow ash inside, providing more fiber, but certainly less appeal.  (With cobbler you couldn’t say the ash was pepper.)  After about an hour, it was do or die.  The coals would be swept off and the lid removed, to find…simply the best possible concoction you would ever hope to eat on a weekend scout camping trip.

Peaches are in season.  It is time to make the cobbler!

I had fun researching peach cobbler recipes.  Most are more of a crisp or crunch-style compared to what I remember.  This recipe, from Betty Crocker, uses fresh (of course) peaches and calls for cobbler dough made from scratch.  Use Bisquick if you must, but this is almost as easy to make, and in my opinion, much better.

You've got to start with good peaches.  Mine came from two sources:  Renninger's Farm and The Farmer's Daughter Farm Market.  I thought I had enough with one stop, but several disappeared before I could make the cobbler.  Hmmmmmm....

PEACH COBBLER
(Click on any image to enlarge it)

Ingredients
For the peaches:
4 cups sliced fresh peaches (approx. 6 med. Peaches)
½ cup sugar
1 Tablespoon cornstarch
¼ teaspoon ground cinnamon
1 teaspoon lemon juice

For the cobbler dough:
3 Tablespoons shortening
1 cup all-purpose flour
1 Tablespoon sugar
1½ teaspoons baking powder
½ teaspoon salt
½ cup milk

Serving suggestions:  Serve warm with cream, milk or ice cream

Directions:

Preheat oven to 400°.  

The first step is to peel and slice the peaches.  In researching peach cobbler recipes, I came across a fantastic way to peel peaches.  It’s similar to the method used for peeling red beets that I described in a previous post.  To easily peel fresh peaches, dip the peaches into a saucepan of boiling water.  Allow the peaches to remain submerged for one minute.  
The skins will then effortlessly slip off.  Use your fingernail, or a paring knife to start, or just use your hands to rub the skin off.  The best part is that only the skin comes off.  You don’t lose any peach flesh by using this technique.  Cut each peach in half and remove the pit.  Slice the peaches into thin wedges.

Okay, I know you're not supposed to show the mess when posting a
recipe, but there is no neat way to peel, pit, and slice six peaches.
Be Prepared!...which is also the Boy Scout motto.
Mix ½ cup sugar, the cornstarch, and cinnamon together in a 2-quart saucepan.  Stir in the peaches and lemon juice.  

Heat over medium heat, stirring constantly, until the mixture thickens and boils.  Allow to boil for one minute.  

Pour the peach mixture into an ungreased 2-quart casserole, and keep the peach mixture hot in the oven.

To make the cobbler dough, combine the flour, 1 Tablespoon of sugar, the baking powder, and salt in a medium-sized bowl.  Cut the shortening into the flour mixture using a pastry blender, or use two forks.  Blend until the mixture looks like fine crumbs.  

Stir in the milk until thoroughly moist.  

Drop the dough by 6 spoonfuls onto the hot peach mixture.

Bake 25-30 minutes or until topping is golden brown.  Serve warm with cream, milk or ice cream.  (It’s delicious plain, too!)

Enjoy!