Thursday, May 26, 2011

Pasta Salad


Several weeks ago I told you about PFC's Men’s Fellowship Dinner…a manly dinner, cooked for men, by men.  Roast beef, baked potato, corn, and pie.  It’s what’s for dinner!

Well, the ladies of Parker Ford Church, not to be outdone, have their own dinner…a “carry-in” dinner.  That’s right.  Each woman creates a dish at home and brings it to the dinner.  Seems like a cop out to some of us men, but then again…think about the possibilities of a men-only carry-in dinner.  I’m afraid there’d be road kill.

My daughter-in-law, Laura, invited my wife to attend the dinner, and they discussed what food to bring.  A pasta salad was decided upon, but as both women are members of the work force, I volunteered to make the dish.  I wonder if any of the women attending knew that a dad in the kitchen had contributed to their women’s dinner?

‘Tis the season for pasta salad.  With Memorial Day coming up this weekend, pasta salad could be in your future.  This recipe has a health and safety advantage over most picnic salads as it does not contain any mayonnaise…or more specifically, any raw eggs.  Salads that contain eggs or milk risk bacterial contamination if left at room temperature longer than a half hour.  “Dr. Potato,” at the Idaho Potato website, quotes 2005 food code information from the FDA advising that such salads must be kept at 40° or colder to remain safe.  As outdoor picnic temperatures are significantly higher than this, always place containers of salads such as potato or macaroni salad in a larger bowl or container filled with ice.  You can also simply serve them from a cooler.  My friend, Don Trauger, uses an old sand table from his daughter’s pre-school years.  The table has a plastic liner that Don fills with ice, and all of the salads are served from it.  One word of caution:  Pre-school furniture is dog-height!

The ingredients in this pasta salad recipe allow it to be served outdoors without the same level of risk you would have for salads made with eggs or milk.  Still, you can’t go wrong keeping any salad in an ice bath or cooler.

Pasta salad is easy to make and the ingredients are basic.


Ingredients:
1 lb. Rotini, spiral pasta
1 head of broccoli, chopped
½ green bell pepper, chopped
½ red bell pepper, chopped
1 pint cherry or grape tomatoes
½ cup fresh chopped parsley or 2 Tablespoons of dried parsley flakes
Approximately 2/3 of a 16 oz. bottle of Wishbone (or your favorite) Italian salad dressing
Sliced pepperoni

Prepare the water for cooking the pasta.  Follow the package directions, and make sure that you use enough water.  Do not add oil to the water, as this will prevent the dressing from adhering to the pasta.  Adding a half teaspoon of salt to the water will help to flavor the pasta.  Rotini pasta is great for this salad as the spiral shape helps to hold the dressing.

While the water is heating to a boil, begin chopping the vegetables.  Sometimes, broccoli is not as crisp as it should be.  To remedy this, prepare a bowl of ice water.  As you cut the pieces of broccoli from the head, place them in the ice water.  Usually, within minutes, the broccoli will be much crunchier.  Chop the peppers, (and the parsley, if using fresh).

Immersing broccoli in ice water helps them become crisp and crunchy
As soon as the water gets to a rolling boil, pour the pasta in a stir.  Reduce the heat slightly, keeping the water boiling.  Cook the pasta using the al dente timing on the package, which will be a little less than fully cooked.

When the pasta is finished cooking, drain it by pouring it into a colander or strainer.  Rinse the pasta in cold water to stop it from cooking.  Rinsing also removes some of the surface starch which can cause the pasta to stick together.  Allow the pasta to sit and continue to drain while you finish preparing the vegetables.  Periodically gently shaking the strainer helps to release remaining water from the spirals.

Wait to add the pepperoni until you're ready to serve
Combine all of the ingredients, except the pepperoni and add about 2/3 of a bottle of Italian salad dressing.  Toss thoroughly and chill in the refrigerator.  This salad is best if made the day before, as the extra time allows everything to marinate.  Toss it from time to time to redistribute dressing that has migrated to the bottom of the bowl.  Pepperoni tends to get a little funky if you add it too far in advance.  When you’re ready to serve the salad, (or ready to get into the car to go to your picnic), add as many slices of pepperoni as you’d like.  With the exception of the pepperoni this salad keeps nicely in the refrigerator for several days.

Enjoy…and don’t forget to offer thanks for those whose sacrifices make possible many of the blessings our country enjoys.  Happy Memorial Day!

Sunday, May 22, 2011

Lemon Lime Sorbet


Another sorbet recipe!  Is there no end?  Probably not.  Even Ben & Jerry’s Homemade Ice Cream and Dessert Book has this to say about sorbet:  “If there is a special flavor or ingredient you would like to try --- and we haven’t included it here --- go right ahead.  It will probably work just fine and taste great.”

Whenever I hear encouraging words like those; that it’s really hard to mess it up; I’m motivate to try just about anything.  I stayed rather conservative with my third batch and made lemon lime.  It was really simple to make and the flavor was crisp and refreshing.  I actually doubled the amount of sugar in the original recipe I found on the internet, and the finished sorbet still had a serious tartness.

Ingredients:
Zest of one lemon and one lime
1 cup sugar
1 cup water
1 cup (total) freshly squeezed mixed lemon and lime juice.  (Approx. 3 lemons and 2 limes)
¾ cup ice water

Use a fine hand grater to make the zest.  Finer grating makes the flavor more intense.  To zest, use the grater to remove just the outside layer of the lemon and lime.  Don't grate too deeply.  The white material under the skin is very bitter.

This is the hand grater I used to make the zest
Bring the zest, sugar and water to a boil in a small pot.  Reduce the heat and gently simmer for about 5 minutes.  Remove from the heat and allow to cool.  The original recipe called for the zest to be strained from the water and sugar mixture after cooling.  I decided to leave it in as it had been grated so finely.  I was glad I did.

I got a new gadget for squeezing the lemon juice.  You've probably seen these, and as with most kitchen gadgets, I'm skeptical.  However, this one, picked up at The Restaurant Store in Reading, works like a charm.  Try to picture this:  You halve the lemon and actually place the cut end facing down in the cup with the holes.  Pressing the two sides together actually turns the lemon half inside out, and it really does extract most of the juice.  The yellow model is for lemons, but I also tried it on the limes, not wanting to spring for the green model...just in case.  There wasn't the same level of compression for the lime and juice remaining in the lime had to be squeezed the old fashioned way.


Stir the lemon/lime juice and ¾ cup ice water into the cooled sugar, water, and zest mixture.  Mix thoroughly.  Cover and place in refrigerator for at least an hour.  You may want to put the mixture in the freezing can of your ice cream/sorbet maker before putting it in the refrigerator.  This will help keep it cold when transferring it to your ice cream maker.

Freeze following the instructions for your ice cream maker.  For more detailed directions on how I use mine, see the post for Raspberry Sorbet.

After freezing, remove sorbet to an air-tight plastic container and allow the sorbet to ripen in a freezer for 3-5 hours.

Enjoy!

Thursday, May 19, 2011

The Perfect Omelet


I love to cook breakfast.  When the kids were growing up, omelets were the order of the day on most Saturday mornings.  Simple cheese omelets filled the requests most of the time, but as the kids grew, so did my adventurousness as well as my repertoire.  Garden omelets, hot sauce and salsa-stuffed ones, and my personal favorite…asparagus and cheese, all became frequent options.  As an omelet-making incentive, I’ve enjoyed having the “raw material” right in my own back yard.

I’ve raised chickens now for about 12 years, and have really enjoyed tending “the girls” as a part of my daily routine.  Why chickens?  Perhaps the connection is that I used to gather eggs on Uncle Russell’s farm as a kid.  My first dozen layers were about 8 weeks old and purchased from Moyer’s Chicks in Quakertown, but I’ve had as many as 32 hens at a time.  Those were raised from two-day old peeps, purchased from McMurray’s Hatchery in Webster City, Iowa.  At McMurray’s, the chicks are hatched and shipped immediately, without food or water.  Newborn peeps can easily survive for up to three days without food or water, so when you get the call from the post office, you go.  I was surprised that our first shipment came on a Sunday morning.  I got the call and took Matt along to the Collegeville Post Office after church.  I told him that he could tell his friends that he and his father had been out picking up “chicks” over the weekend.  (He didn’t, and as a middle-schooler, didn’t think that was particularly funny, either.)

Three breeds of poults:  White Leghorns, Barred Rock, and Rhode Island Red
I set up the first brooder in which to raise the chicks, in the basement.  What a mistake.  It started out okay, but as the birds grew, and their wings developed, they began to exercise them.  The resultant dust was blown all over the place by the poults and took forever to clean up.  It was literally everywhere.  Future brooding was banished to the sheep shed.

For the last year, I’ve had 8 birds.  Then there was the raccoon incident, (and then there were 3.)  Just last week, before dark, a fox got two more.  The sole survivor is a barred rock, and she has been faithfully laying an egg a day, even after being traumatized by having her remaining two coop-mates snatched from her.  I used to be able to let the hens free range non-stop.  Now, the Skippack area has become so much more developed that something seems to be waiting for the birds if they are ever left out to stretch their claws.

I’ll get more, but it’s generally easier to start with a “clean slate” instead of trying to introduce new birds to an existing flock.  The “pecking order” is alive and well!  For now, one egg a day will do.  I just have a number of friends who miss getting the best brown eggs you can find.

Ben Sagnella & Emily Fender*, current Royersford Elementary 4th graders, "melt"
while holding a newborn chicks when they were in kindergarten
Each year in the spring, the kindergarten classes at Royersford Elementary experience a chick-hatching project right in their classrooms.  In addition to teaching the children a lot of science, believe it or not, raising the chicks is a developmentally appropriate way to introduce the beginning concepts of sex education.  One of the best kindergarten stories involves a chick-napping incident.  After the peeps had hatched and the chicks had developed into adorable little balls of fluff, one went missing….without a trace.  It was a mystery…until an older brother "dropped a dime" on his younger brother.    The kindergartner had spirited the chick out of the classroom in his backpack.  He then continued the “chick-op” by smuggling it into his bedroom without being detected.  A phone call home enabled his mother to locate the baby bird.  She found the peep nestled under the covers in her son’s bed, right where he had been caring for it…for four days!  Imagine the condition of those sheets! (*Ben & Emily were not the culprit!)


A lot of people shy away from omelets, thinking that they are too difficult.  They do require a little more expertise than scrambled eggs, but anyone can make a perfect omelet.  First, start with the right pan.  I use a non-stick 8” Caphalon pan.  I’m fairly particular about my omelets, so I cook nothing else in my omelet pan.  Here's the spatula I use.  It's narrow enough to maneuver easily, but long and sturdy enough to flip the omelet properly.

To make a basic omelet you need the following:

Ingredients:
2 eggs
2 Tablespoons water
pinch of salt (optional)
dash of pepper (optional)
1 Tablespoon margarine or non-stick cooking spray

Basically, you use one tablespoon of water (not milk) for every egg.  Use milk when making scrambled eggs or French toast, but water combines with the eggs to make a "stronger" omelet.  Remember, you have to flip it...in one piece.  I also seem to get better results with room temperature eggs and water.  I don’t cook with butter in the omelet pan as it tends to burn more quickly compared to margarine or cooking spray.  Brushing the pan with some olive oil or other cooking oil would also work well.


I usually beat the eggs and water with my hand blender.  Some criticize this practice saying it makes the eggs too fluffy.  Now really…can you ever get eggs too fluffy?  I like them that way.  I also add salt and pepper after cooking, rather than adding it when beating the eggs and water.  Not to worry if you don't have a hand blender.  A fork works just fine.  Beat the eggs until the yolks and whites are well blended.

You should see the edges start to cook almost immediately
Heat the pan over medium to slightly higher heat.  After “lubricating” the omelet pan, gently pour in the beaten eggs and water.  If the pan is at the right temperature, you should hear a slight sizzle and notice the eggs beginning to cook almost immediately at the edges of the pan.  Allow the eggs to cook for about 30 seconds to a minute.

Omelet after "draining," and before flipping
Then use a spatula to start lifting the sides of the omelet to allow uncooked egg to flow underneath.  Divide the omelet into for quadrants or sides and repeat this, lifting all four "sides," allowing the egg to "drain."  Most of the uncooked egg should be allowed to flow under to be cooked.  If more remains, continue to lift the sides.

"Just flipped" omelet
After another 30 seconds or so, place the spatula under the omelet and quickly but gently flip it over.  Once flipped the uncooked top can cook.  If, when starting to lift the omelet, it starts to break up, you probably haven’t allowed it to cook long enough.  Wait a little longer or increase the heat for the next omelet.

Place desired filling on half of the almost-cooked omelet
If you have cheese or some other filling, (use about 1/3 to 1/2 cup), place it on top of one half of the omelet as soon as it is flipped.  After another 30 seconds to minute, use the spatula to fold half of the omelet over, on top of any filling.  Slide the omelet out of the pan and onto a plate.

Asparagus & Cheese; my personal favorite
For an asparagus and cheese omelet, I usually use cheddar cheese and pre-cooked asparagus…which I had plenty of after Easter.  Remember the three side dishes in a previous post?  Well, I prepared the asparagus and water chestnuts, but left it sit in the microwave until mid-dessert.  (No one felt like asparagus at that point!)

Another favorite is a sautéed onion, ham and cheese omelet.  (See opening photo.)  It’s always a good idea to have all of your omelet fillings prepared in advance.  Dice the onions first.  If you have never known how to dice onions easily and without tears, check out this one-minute video from Good Housekeeping on YouTube.

Onions, before and after sautéing
Use a little oil to sauté the onions and allow them to cook until they start to become translucent.  Set the onions aside.  Have your ham diced and your cheese ready, (shredded is good, but slices work, too).


I tried something different this time around, adding a half-teaspoon of horseradish to the eggs and water before beating them.  (In order to get the horseradish to pour with the eggs, don’t allow the it to settle and pour the mixture into your omelet pan in one continuous motion.  Cook as described above, add the cheese, onions, and ham…fold and serve.  The horseradish wasn't overpowering, and really added something.

I encourage you to be adventurous in exploring potential omelet fillings.  Always check your leftovers.  Use them to create a new omelet name.  If it sounds good, it probably is!  Enjoy!

Tried another sorbet!  Lemon-lime…and it was the best yet!  (Also, very easy to make.)  Stay tuned for the incredibly simple recipe.

Friday, May 13, 2011

Mango Sorbet


My adventure making raspberry sorbet was such a kick that I’ve been inspired to try some other sorbet recipes.  I’m waiting for local strawberries to come in.  Making that sorbet will be a no-brainer.  The other day while at Trader Joe’s, I found frozen mango puree, packaged in four quarter-pound pouches.  The full pound is just the right amount to make a quart of mango sorbet.  I looked at several suggested recipes online, picked and chose what I thought would work, and this is what I used:

MANGO SORBET

Ingredients (makes approx. 1 quart):

1 lb. mango puree
1 cup sugar
1 cup cold water
Juice of 1½ limes (approx. ¼ cup)


That’s all it takes!  Make a simple syrup from the water and sugar by heating in a saucepan until the sugar is totally dissolved.  Cool in refrigerator.  When the syrup has chilled somewhat, you can add all ingredients together and allow them to chill together.  (It’s always a good thing to chill together, isn’t it?)

Freeze using an ice cream or sorbet maker, following the manufacturer’s directions.  For more information on how I use my ice cream maker, see the Raspberry Sorbet post.

The mango sorbet was served with shortbread cookies and was delicious.  It is a light dessert that has a fresh taste.  If you have a favorite sorbet (or ice cream) recipe, send it to me.  Or, if you have a suggestion for a sorbet, let me know.  I’m willing to try almost anything!

Enjoy!

Tuesday, May 10, 2011

Turkey a la King & Peach Glazed Carrots


Sometimes you’ve just got to go with what you have.  Certainly that has been true during my life when limited resources, finances, or abilities have seemingly closed doors.  Forging ahead and making the best of tough situations have almost always proven to be positive growth experiences for me.  I highly recommend it.

It’s no different in the kitchen.  Improvising and finessing are often required, and such was the case two weeks ago when I peered into the “Frigidaire,” as Uncle Russell used to call it.  It’s funny how one word can bring back a flood of memories.

Uncle Russell was the first-born of the “bakery” Latshaws.  Born in 1895, he fought in WWI and never married.  He was born in the bakery, as were all twelve of the children of Hosea and Zaidee.  Russell lived on the Latshaw farm on Wall Street with his sister, Sara, who also never married and was a school teacher.  Russell could improvise with the best.  Some said that his resourcefulness came from living through the Depression.  Others said it was because he was cheap.  Still others said it was because he was a Latshaw.

Uncle Russell and me.  He was almost 60 in this
picture, and lived to be 90.
Growing up, one of the most entertaining adventures for us was the weekly trip to the dump.  Yes, you heard correctly.  Spring City operated a town dump on South Main Street near the water treatment plant.  I suppose it was closed in the early 70’s.  But up until then, Russell would come for the trash every Thursday, and if we were lucky, we were allowed to ride along in his Chevy pick-up truck...and then later in his Datsun truck.

Chevy and Datsun Pick-Ups, just like Uncle Russell's.  (His Datsun didn't have mag wheels!)
What was the attraction?  I’m not sure.  Maybe it was the chance to heave stuff out of the back of a pick-up truck as far as you could throw it.  (And some things made impressive crashes.)  Maybe it was watching the large bulldozer covering the refuse with dirt.  More than likely it was watching Uncle Russell retrieve items of value that others has discarded.  I remember one occasion when Uncle Russell got out his “dump tools,” as we referred to them, and proceeded to remove about a dozen door knobs and lock sets from old doors that had been trashed.  I’m not sure if this is true, but we used to say that there were times when he’d come back from the dump with more than he had taken.

Back to my refrigerator…The pickings were slim for making dinner.  I had about a half of a turkey breast leftover from Easter, a half of a green bell pepper and half of a red one as far a raw ingredients were concerned.  For whatever reason, I remembered a Chicken a la King dish that a friend of our family, Reba Overholtzer had served us many years ago.  Maybe I could make it with turkey.  I was off to the computer to research recipes.

As is often the case, I assimilate several recipes I find into the final approach I use.  The recipe that made the most sense to me was found on allrecipes.com, and I adapted it.  I found a small can of sliced mushrooms and a bag of frozen peas, and I was good to go.  This a la king dish is a great way to use up leftover chicken or turkey.  It’s important to note that it must be already cooked for this recipe.  Here are the steps I used, followed by an improvised way to make glazed carrots.

CHICKEN OR TURKEY a la KING

Ingredients (serves 4):
1 (4 oz.) can sliced mushrooms, drained
½ green bell pepper, chopped
½ red bell pepper, chopped
¼ cup (½ stick) butter
¼ cup all-purpose flour
¼ teaspoon salt
¼ teaspoon ground black pepper
1 chicken bullion cube (Knorr’s preferred)
¾ cup milk
¾ cup hot water
2 cups cubed cooked turkey or chicken, cut in to ½” pieces
2/3 cup frozen peas

Chicken a la King is usually served over toast points, noodles, or rice, so have that ready to go, too.

Before getting started, heat the water and the bullion cube in the microwave for a minute or two.  This will help dissolve the bullion.  Set aside.


Melt the butter in a large frying pan and sauté the chopped peppers and mushrooms for about five minutes.  Remove the pan from the burner.  It’s generally a good idea to do this between steps.  That way things don’t get “away from you” while you’re obtaining ingredients.

You want the flour to blend as much as possible with the remaining butter in the pan
Blend in the flour, salt, and pepper over medium heat until the vegetables are uniformly coated.  


Remove the pan from the burner again and incorporate the water, bullion, and milk, stirring until somewhat blended.  Return the pan to medium high heat until the mixture boils.  


Don’t stop stirring as you allow the mixture to thicken.  This should happen fairly quickly.

After adding the turkey and peas, this started to get a little thick.
I thinned it with a 3-4 Tablespoons of water.
Reduce heat to medium and stir in the chicken or turkey and the peas.  Allow to heat through completely, remembering that the meat is already cooked.  It just needs to be heated.  Serve over rice, noodles, or toast points.  If the mixture is too thick, add a small amount of water and stir gently to thin.

PEACH GLAZED CARROTS

Another spur of the moment recipe, I again used what I had on hand.  Most glazed carrot recipes call for apricot or peach preserves.  As I had none, I improvised.

Ingredients (serves 4):
2 cups chopped carrots (approx. 1” pieces)
1 Tablespoon butter
1 Tablespoon brown sugar
6-8 slices canned peaches

Chopped carrots ready to be steamed.  Note the holes in the bottom of this pan insert.
Peel and chop carrots into 1” pieces.  Cutting them diagonally makes them more interesting.  Cook the carrots.  I prefer steaming them as they accept more of the glaze than if they are boiled.

Steamer insert - Measure the base before buying
to make certain it will fit in your saucepan.
If you don’t have a steamer pot, you can buy an expanding insert that will fit most larger pans.  Steam the carrots until they are almost tender, and set them aside.

While the carrots are steaming, puree the peach slices, along with a little of the juice, in a blender or food processor.  Set aside.

Melt the butter in a separate saucepan and add the brown sugar.  Stir over medium heat until bubbly.  Remove from the burner.  


Add the pureed peaches and stir.  Finally add the carrots and continue heating over medium heat until the carrots are tender.  If possible, allow the carrots to steep/marinate until you’re ready to serve them.

Fairly simple…basic ingredients…and the savory taste of the Turkey a la King goes well with the sweet glazed carrots.  Enjoy!

This week I tried another sorbet recipe….mango!  Practice makes perfect.  This mixture was ready after only 15 minutes in the ice cream maker!  I’ll try to post that recipe later this week.

Tuesday, May 3, 2011

Raspberry Sorbet a la Ben & Jerry's


Matt and his friend Geoff Cornish getting ready to "flip their lid"
When the kids were younger, one of our favorite events was an annual camping trip to Vermont.  For twelve years in a row we packed up the car with everything we needed for a week in the woods.  Vermont operates on a different wavelength, and we always appreciated the change in routine.  A favorite tourist spot, (in fact, the most popular attraction in Vermont), is the Ben & Jerry’s Factory Tour in Waterbury.  I’m not sure how many times we visited over the years, but it was more than a couple…and we have the tour buttons to prove it!

On one of those visits, I purchased an ice cream recipe book.  We received an ice cream maker as a wedding present and my thought was that I could make my own Rain Forest Crunch whenever I wanted some.  That didn’t happen.  I think we made one recipe…plain vanilla…and then shelved the book.  I pulled it out a week before Easter this year, thinking that I could make a special dessert.  That didn’t happen either.

I’ve never made a sorbet, or even a sherbet for that matter, (which will become obvious as you read this), but am always game for a new challenge.  The raspberry sorbet recipe seemed very basic and the ingredients were simple…a perfect recipe for TADITK (There’s a Dad in the Kitchen).  It also involved a machine.  What dad could ask for anything more?


Ingredients (makes one quart):
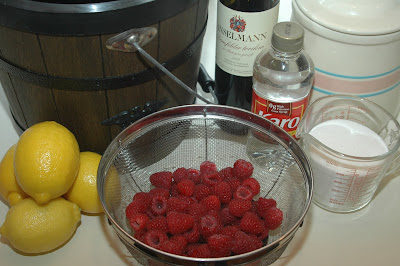
¾ lb. of fresh raspberries                        ¼ cup dry red wine
1½ cups sugar                                    ¼ cup light corn syrup
Juice of ½ lemon                                    1 cup cold water

First, it is necessary to prep the raspberries.  After rinsing, drain and combine them with the sugar and fresh lemon juice.  The B&J recipe only said “combine,” so I decided to mash them a bit.  I did so, but as it turns out, I should have mashed them more thoroughly, or even pureed them.  Stay tuned….

Raspberries, sugar and lemon juice.  Mixture should have been mashed
much finer, or pureed.  Refrigerate at least an hour before freezing.
As with any ice cream, sherbet, or sorbet that you are going to freeze at home, it is very necessary to seriously chill the mix before freezing it.  Doing so will save an amazing amount of time, (and ice).  So, refrigerate the berries, sugar and lemon juice for at least an hour.  This recipe calls for a ¼ cup of dry red wine.  I know that you’re not supposed to refrigerate red wine, but it’s going into sorbet, for Pete’s sake, so I stuck that in the refrigerator, too.  It’s also a good idea to use refrigerated water.  Don’t chill the light corn syrup, because you’re going to have to blend it with the rest of the ingredients.  Corn syrup thickens when cooled.

I was a little dubious about the red wine in the ingredients; worried about the effect it might have on the taste.  To me, sorbet and red wine are mutually exclusive.  That turned out not to be a concern, as the sugar and corn syrup more than compensated.  Ben & Jerry recommend a "generous shot of Chianti" poured on top of the raspberry sorbet before serving.  Couldn't do it.

The ice cream maker that I used is more than 30 years old, as you can tell from the scans of the owners manual, below.  Some makers churn by using a hand crank, but ours is totally modern.  It has an electric motor!  The motor actually turns the freezing can while the dasher, (mixing beater), remains stationary.  The can spins in a bath of briny ice water.  Mixing salt with ice lowers its temperature drastically, and the spinning action of the can actually causes a smoother texture to whatever you’re freezing.

1970's vintage Proctor-Silex Ice Cream Maker instruction and recipe booklet
After the hour of chilling the ingredients in the refrigerator, mix all ingredients together and place them in the freezing can, inserting the dasher and assembling the ice cream maker according to directions.  It’s a good idea to run the maker without ice for a minute or two to make sure everything is working properly.

Freezing can is on left and dasher is on right
If you don’t have access to crushed ice, you’ll have to crush your own.  This is easily accomplished with a cutting board, a gallon Ziploc bag and a wooden meat-tenderizing mallet.  Place about four cups of ice in the bag at a time, seal it tightly and smack any cubes, so that the resulting pieces are no bigger than large dice.  (The dogs, who had been in the kitchen, left and took refuge when I started crushing the ice.)

Ice must be crushed or sorbet will not freeze with a smooth texture
With the ice cream maker running, begin adding the ice to the space between the walls of the bucket and the freezing can.  Add three inches of ice and then sprinkle 3 tablespoons of salt.  If you use table salt, use level tablespoons.  If you use rock salt, use heaping ones.  Continue layering in this fashion until you reach the top of the freezing can.  As far as the amount of ice needed, I used a little less than an 8 lb. bag of ice to make a quart of sorbet.  More ice would be needed for larger recipes.  It’s really important to keep the drainage spout clear as the ice melts.  You do not want the brine solution to rise above the top of the freezing can.  Salty water and sorbet don’t go together very well.  It is amazing how cold the salt and ice mixture gets.  My thermometer registered 13°!

Note the ice filling the space between the freezing can and the sides of the bucket.
Below, is a short video of the ice cream maker in operation.  The can, not the dasher, moves.

My ice cream maker is so high-tech that when the ice cream is done, the motor just stalls.  It is critically important that you unplug the motor immediately, or the unit will be damaged.  I’m thinking that newer models must have an automatic shut off, but it’s still better than hand cranking.  The raspberry sorbet was ready in about 20-25 minutes.

Fairly smooth textured sorbet after 20 minutes of churning/freezing,
and ready for ripening.
Here is the part for which I was initially unprepared when making my first batch of ice cream:  When the ice cream maker stalls, you would think that the ice cream is ready, right?  Wrong.  It has to ripen.  That means it has to spend time in an actual freezer…about 3-5 hours...and it's really hard to wait.  While you think you should be able to just put the mixture directly into a freezer, you can't.  The ice cream maker does two things for the ice cream or sorbet.  First, it blends the ingredients into a smooth, super-cooled mixture.  Secondly, it adds an invisible ingredient…air.  Without air, any ice cream or sorbet you make would just be a solid, impenetrable block of ice.  The richer the ice cream, the less air in it, but it has to have some, or it would be incredibly inedible.

The recipe yields about one quart of sorbet.
Notice how quickly it began to soften before ripening.
After ripening, I was more than ready to try the sorbet.  The taste was really quite good.  However, due to the fact that I did not puree the raspberries more, the larger pieces of berry had frozen solid.  That was not a pleasing texture.  And frozen berry takes longer to melt in your mouth, and therefore takes longer to taste.  The trouble is that the frozen berry has already numbed your tongue and by the time it melts, you can’t taste it any way.  Moral of the recipe:  Puree your raspberries!

I’m definitely going to try another batch, especially since I have the raspberries.  In addition to pureeing, I’m also going to cut back on the sugar a little.  Although the frozen chunks of fresh raspberry were a little tart.  So if they are pureed, I'm thinking that will temper the sweetness of the sorbet a little.  Stay tuned.  I'll post the new results.  At some point I also want to try several other sorbets.  I have recipes for kiwi and strawberry, and fresh local strawberries are just around the corner!

TRUTH IN ADVERTISING DISCLAIMER:  Thanks to all of you who voted this week, helping me to select the next dessert recipe on TADITK.  However, in the interest of truth in advertising, I have to come clean.  When I left the house for a breakfast meeting on Monday, Raspberry Sorbet was winning.  I stopped for the ingredients on the way home, spending almost $15 on raspberries, only to find that the Jewish Apple Cake had beat out the sorbet by one in the final moments of voting.  If you think I’m going to disregard $15 worth of any fruit, you would be mistaken.  To those of you who voted for the apple cake:  Take heart.  I promise it will be the next dessert posted!


UPDATE:  Second Batch a Success!
Posted May 4, 2011

Success!  The second batch of raspberry sorbet was much improved.  Pureeing the raspberries along with the sugar and lemon juice did the trick.  Before placing those three ingredients in the blender, I mashed them as I had done for the first attempt.  They were then blended on the “puree” setting and refrigerated for an hour.  Notice the smoother texture of the pureed berries below.


I did not change anything else about the original recipe.  I was going to cut back on the sugar, but my instincts told me that the tartness of berries once pureed would balance out the intense sweetness of the sugar and corn syrup that was present in the first batch.  It did.  The final product had a good flavor…not too sweet, and not too tart.  The texture of the resulting sorbet was also much more uniform and smoother.  The only drawback drawback for some might be the presence of raspberry seeds in the sorbet.  They’re not that big of a deal, and they certainly let you know that it’s homemade.


The second batch also took 25 minutes in the ice cream maker, and the salt and ice mixture was measured at an impressive 11°.  Below, you can see the sorbet just out of the freezing can and ready to be ripened in the freezer.  It was delicious.  I can’t wait to try some other sorbet recipes.  Remember:  Pureeing is the key!